All luminaires in the same network can be easily controlled from the Luminaires tab. Other devices appear in the relevant section of the More tab. One device can only be part of one network at a time. When a device is part of a network it is in a ‘paired’ state and cannot be added to any other network unless it is first ‘unpaired’.
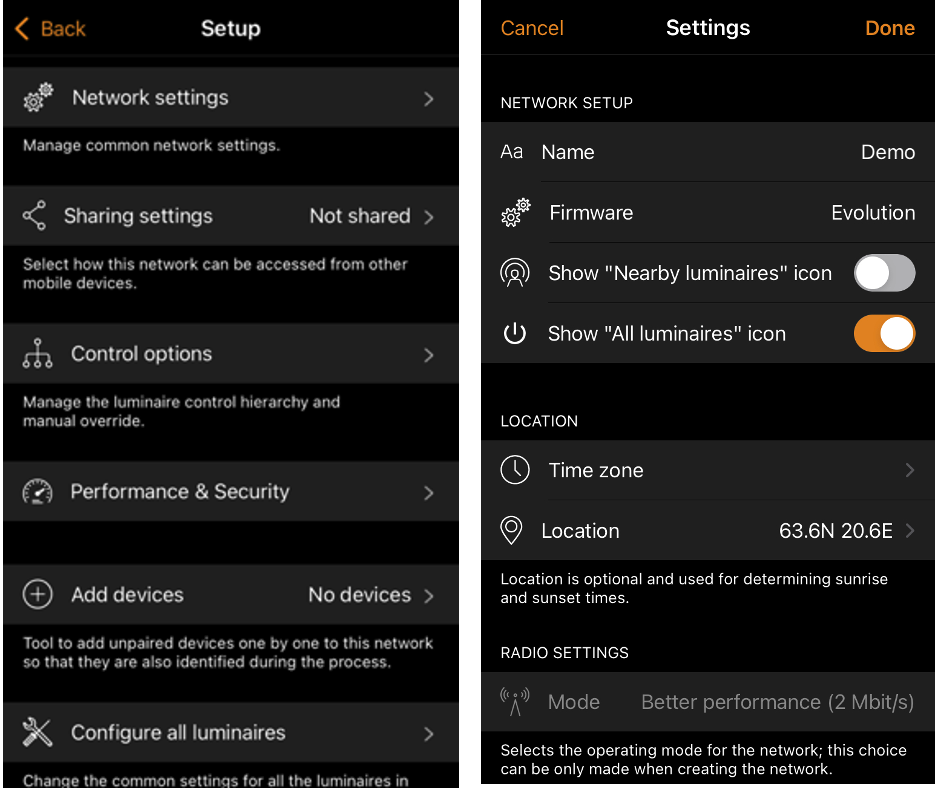
Network settings
To change the network settings, select the More page > Network Setup > Network Settings. There you can change the network name, set the time zone and the network’s location. The location needs to be set if you wish to create timers using local sunrise or sunset as a trigger.
You can also select if you would like the “All luminaires” or “Nearby luminaires” control icons to be visible in the app’s Luminaires tab. Disabling the Show “All luminaires” icon or Show “Nearby luminaires” icon option will hide the relevant control icon for all users in the network.
The network mode and network frequencies can only be configured when creating a network for the first time and cannot be changed after a network has been taken into use. The default mode is Better Performance and should be suitable for most networks. See the Change network section for instructions how to create a new network.
Network frequencies are always chosen in pairs. Communication is always made on both frequencies for redundancy in the event of interference in the mesh network caused by an external source.
Once your network set-up is complete, select Done to finish.